Replacing the siding on your home is one of the most impactful exterior upgrades you can make. It changes how your home looks, how well it holds up against the elements, and how much energy you use to keep it comfortable inside. But before any materials get ordered or installation begins, there are a few things every homeowner in Calvert County and Southern Maryland should understand. Going in informed makes the process smoother and helps you get results that last.
Why Siding Replacement Matters More Than It Looks
Most homeowners think about siding purely in terms of curb appeal, and while appearance certainly matters, siding does a lot more than make a home look good. It acts as a protective barrier between your home’s structure and the outdoor elements. When siding starts to fail, whether through warping, cracking, fading, or moisture damage, the problems it causes go deeper than the surface. Water can work its way behind damaged panels and into the wall cavity, leading to rot, mold, and structural damage that costs far more to fix than a simple siding replacement would have.
In Southern Maryland, where humidity runs high in summer and temperatures drop sharply in winter, siding takes a beating year after year. Catching deterioration early and replacing siding before the damage spreads is always the smarter financial decision.
Fixing What Is Underneath Before You Start
One of the most important steps in any siding project happens before a single panel goes up. The condition of the wall surface underneath the existing siding determines how well the new installation will perform. Rotted wood needs to be replaced. Old caulking around door and window frames needs to be removed and redone. Any structural issues, loose framing, or gaps in the sheathing need to be addressed before the new siding covers them up.
Skipping this step is a common mistake that leads to problems down the road. New siding installed over unresolved issues will not perform the way it should, and problems that were hidden will eventually surface again. A proper assessment of the wall structure before installation begins is not optional, it is what separates a quality job from one that creates headaches later.
The Role of Sheathing and Weather Barriers
Sheathing is the layer installed behind the siding that gives the wall its structural integrity and provides a flat, stable surface for the siding to sit against. Without proper sheathing, siding panels can bow, buckle, or fail to lie flat. Materials like half-inch plywood or oriented strand board are commonly used and need to be in solid condition before new siding goes on top.
A weather-resistant barrier installed over the sheathing adds another layer of protection against moisture infiltration. This is especially relevant in areas close to the Chesapeake Bay, where wind-driven rain and elevated moisture levels are part of everyday life for homeowners.
Choosing the Right Siding Material for Your Home
Vinyl siding is one of the most widely chosen options among Maryland homeowners, and for good reason. It is durable, cost-effective, and available in a wide range of colors and profiles. Horizontal styles like clapboard and vertical styles like board and batten both work well with the architectural styles common throughout Calvert County. For homeowners who want the look of natural wood without the maintenance demands, vinyl options with a cedar wood grain finish deliver that appearance without the upkeep.
The color and profile you choose will affect both the look of your home and its long-term maintenance requirements. Lighter colors tend to show dirt more easily but reflect heat better in summer. Darker tones absorb more heat but can fade over time in direct sun. Talking through these tradeoffs with an experienced contractor before making a final selection saves a lot of second-guessing later.
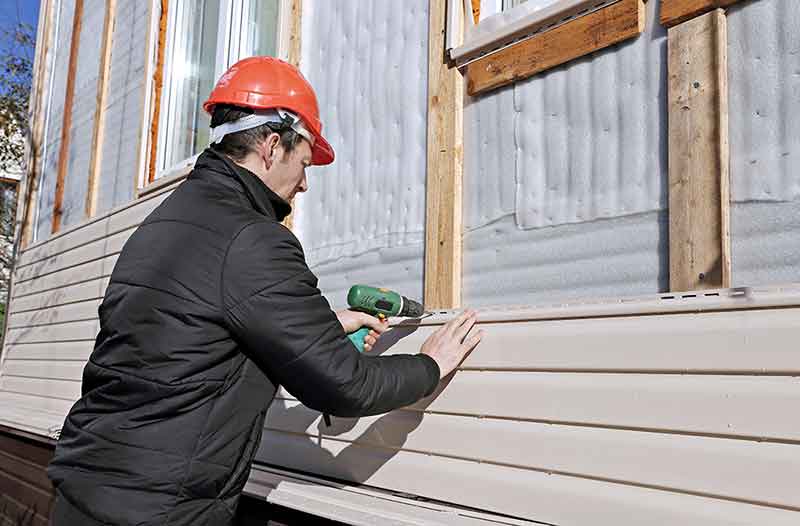
What Proper Installation Actually Involves
Even the best siding material will underperform if it is not installed correctly. Panels need to be measured accurately, cut cleanly, and fastened with the right spacing to allow for natural expansion and contraction through the seasons. Flashing around windows and doors must be installed properly to prevent moisture from getting behind the panels. Corner posts, starter strips, and J-channel trim all need to be set with precision before the first panel goes up.
Each row of siding builds on the one below it, so errors compound quickly if the foundation of the installation is not right. Working with a contractor who has real experience with siding in Southern Maryland’s climate is the most reliable way to get an installation that holds up the way it should.
Ready to Replace Your Siding
If your siding is showing signs of wear or you are ready to give your home a fresh exterior, Park Place Construction serves homeowners across Calvert County and Southern Maryland with quality siding installation and honest, no-pressure consultations. The team is fully staffed Monday through Friday and ready to help you plan your project from start to finish.
Call (443) 968-2327 or visit parkplaceconstruction.net to schedule your free on-site estimate today.